PORTAL GUIDE: SET UP AND ADD COACHEs
NOTE: If you are having trouble with your school’s network blocking the ArenaGear Portal, account request page, or the automatic uploading of run results, please pass this information to your IT department:
The ArenaGear app needs the following ports open on the firewall:
https://arenagear.com
https://portal.arenagear.com
https://api.arenagear.com
port 443/https
Find the TEAMS FAQ here
Access Teams Login from the Arenagear.com website

2. Request an Account

Request a free ArenaGear account to manage and sync class rosters between coaches and get results. Use together with ArenaGear Wristbands to get results instantly to the cloud and run analytics.
3. Fill Out the account request form

After clicking “Request an ArenaGear Account” you will be directed to this Account Request Form. Fill out the Account request form to receive an invitation in your email inbox.
4. check your inbox for the welcome email to register your organization
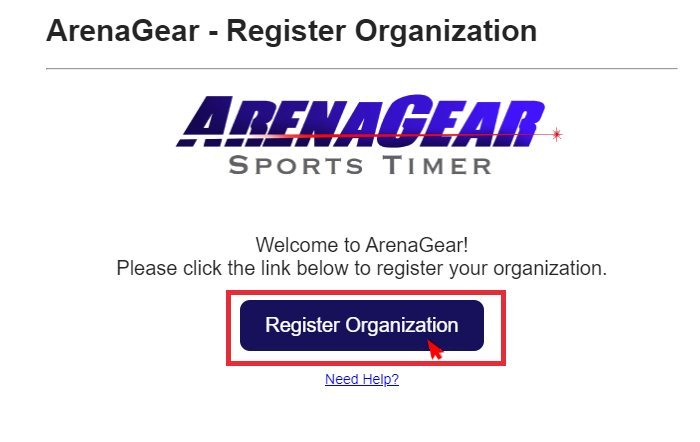
5. Register your organization
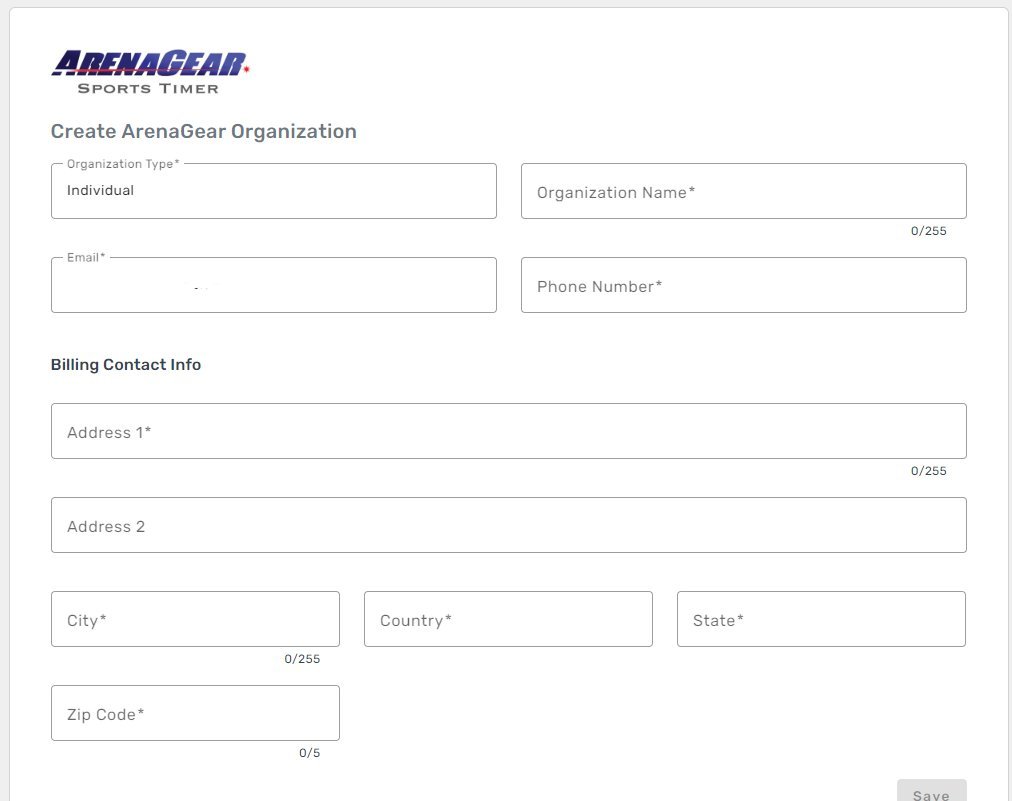
6. After registering your organization, you will get an invitation to join your organization. you will be the organization adminstrator
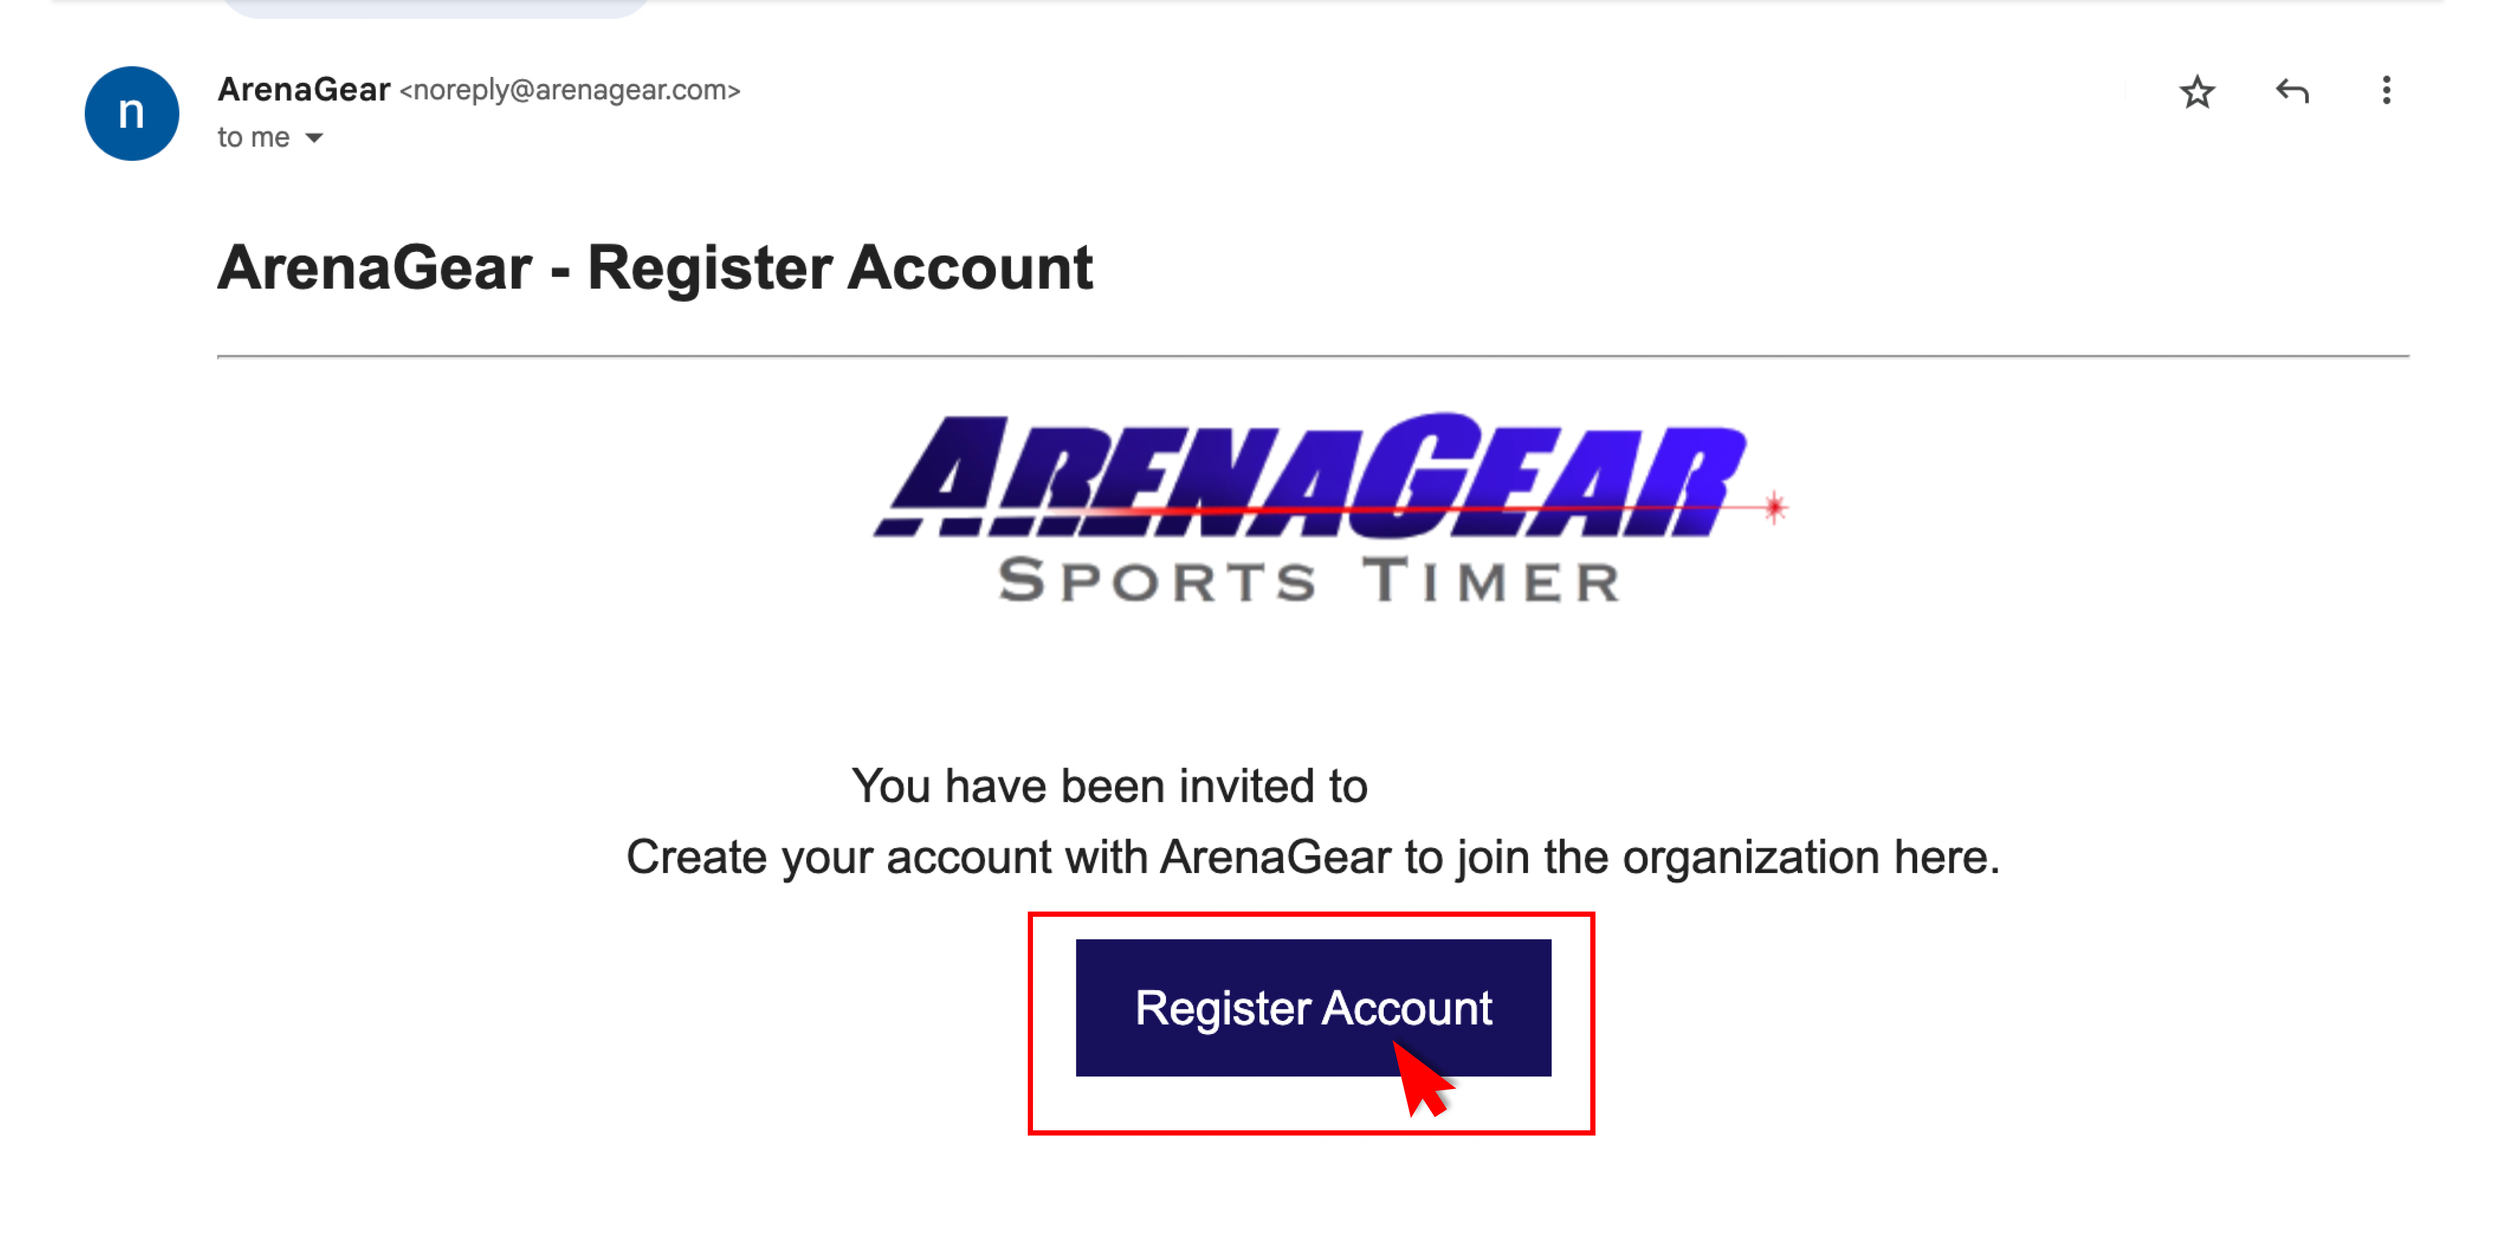
After registering yourself you can proceed to login to the portal. use the user name and password you just created
7. LOGIN

8. Now that you are the administrator, it’s time to invite other coaches in your organization to join. they will have access to all the classes and roosters and can change and delete data. Only administrators have the ability to invite coaches.
-Click “My Users” in the bottom left corner

9. Click the envelope icon on the right to send invitation to coaches

After sending, the coaches will need to accept the invitation and enter their username and password. They will use the coach username and password to log in on the phone app.
PORTAL MAP

Classes: Classes allow you to organize Participants into class-based groups. Classes will automatically sync across all devices in the organization (phones and tablets). Open this Tab to view your synced Class List.
Manage Classes: The Manage Classes Tab will take you to the same screen as the Classes Tab (1). Classes will automatically sync across all devices in the organization (phones and tablets). Open this Tab to view your synced Class List.
To upload a class roster, create a new class by clicking on the (+)
Once created, you can import a CSV with the class roster, create a file with one name and ID per line, following this format:
Name, Unique ID
Name, Unique ID, NumberOnce the class is populated, it will show up on any phone logged into your account. You can add new kids from the phone interface, and the name will be added to the roster on all phones.
Events: Events allow you to organize your data so it’s easy to find, analyze, and export. For example, an event could represent a training session for the day for a specific drill type (e.g., 40-yard dash). This organization method allows you to group runs in a way that makes sense to you. We recommend using the Event Type to organize data collection by drill type, for example, always use “Training 40 YD dash” when running that drill. This will allow you to filter results by drill type when running analytics. For example, you can graph times for a particular athlete on a particular drill, or rank athletes by time on the same drill, etc. Events will automatically sync across all devices in the organization (phones and tablets). You can create Events on the app as you need or on the website portal. Open this Tab to view your synced Events List.
Results: The Results Tab allows you to search your results according to specific dates, Classes, Participants, Event Types and Events. Remember that only runs of students with an active ArenaGear Wristband will be sent to the cloud database. The runs are sent to the cloud in real-time. You may need to refresh your web browser to see them.
Users: The list of coaches in the organization will appear in the here, in the Users Tab.

4. Manage Events: The Manage Events Tab will take you to the same screen as Events (3). Events allow you configure multiple test stations/ gates for competitions or yourself. For example, an event could represent a training session for the day or a specific drill type (e.g., 40-yard dash). This organization method allows you to group runs in a way that makes sense to you. Events will automatically sync across all devices in the organization (phones and tablets). You can create Events on the app as you need or on the website portal. Open this tab to view your synced Events List.
5. Public Events:
6. All Results: The All Results tab will take you to the same screen as Results (4). The Results tab allows you to search your results according to specific dates, Classes, Participants, and Events. Remember that only the runs of students with an active ArenaGear Wristband will be sent to the cloud database. The runs are sent to the cloud in real-time. You may need to refresh your web browser to see them.

7. My Organization: Your organization’s contact information can be found and editted here.
8. My Users: The My Users Tab will take you to the same screen as the Users Tab (5). The list of coaches in the organization will appear here.